My first helicopter - Walkera V200D03
I love this heli.
In fact,
you can safely say I loved
it to death.
Turns out I crashed it so
much that,
eventually,
I couldn't repair it.
(The engine stuttered at
high speed and I didn't know
if it was the ESC or the motor
or what that was failing.)
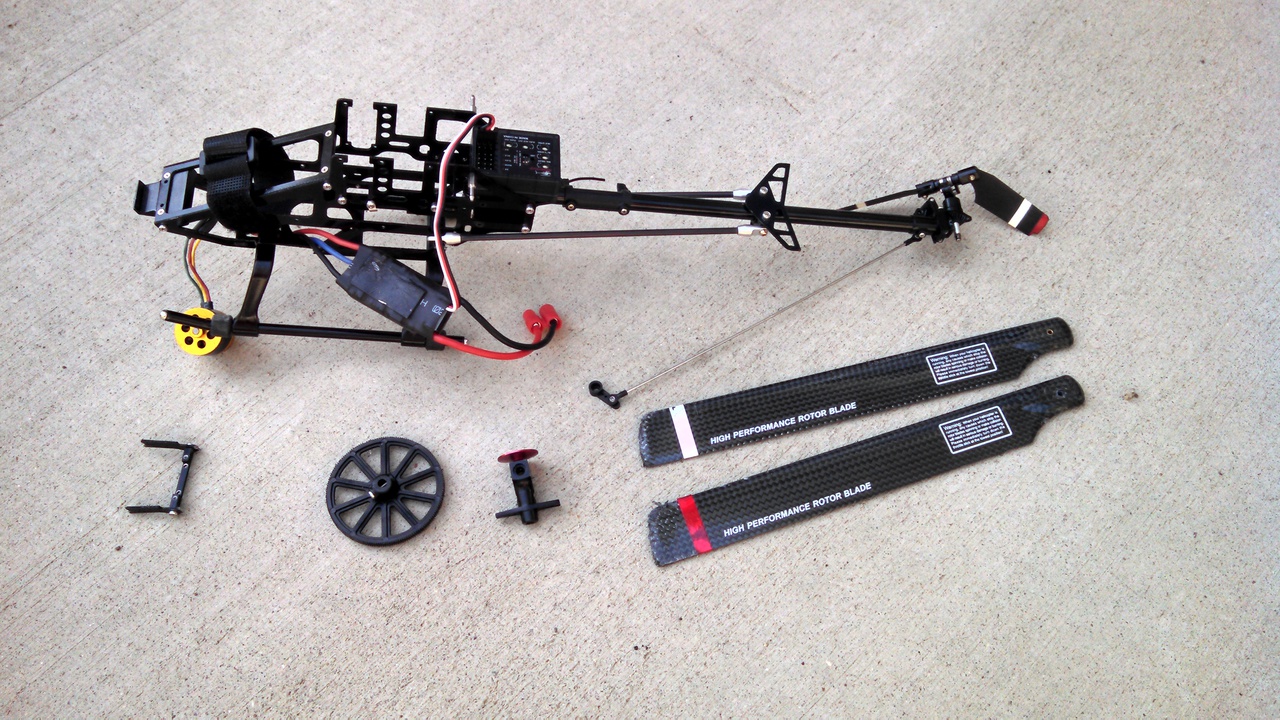
I finally gave up and decided
to buy a new unit and use this
one for spare parts
(the picture above shows its current state).
Wise decision,
I eventually scavenged enough
parts that there's not much
left except the main body
(and there are broken bits from
the frame - go figure).
I'm still happy about this
heli,
it got me started and
trained me up to the point
of being able to hover
for at least 30 seconds.
Another great thing about this
heli is that it's relatively easy
to work on.
The only tools you need
are a 1.5mm hex key
(I use a ball driver,
a screw driver handle with
a hex shaft),
a very small phillips screwdriver,
and teeny tiny fingers
(long nose pliers are an alternative).
Main gear replacement
You'll get rather proficient at this
but here are the steps I follow:
- Unscrew the main blade linkages from the swashplate.
Be careful when screwing the linkages back into the swashplate,
if you get the screw even slightly cross threaded you can wind up
breaking the screw head off - don't do that.
- Unscrew the collar on the main shaft. The collar is just below
the top bearing which is in the frame just below the swashplate.
- Remove the screw that goes through the main bearing and the main
shaft.
- Remove the main shaft. You should now be able to hold the main
gear steady while you pull the main shaft out while simultaneously
twisting the main shaft back and forth slightly. It's a tight
fit but the shaft will eventually pull out, freeing up the main
gear.
Put in the new main gear and reverse the above steps to install it.
One problem is that you have to precisely line up the hole in the
gear with the hole in the main shaft so that you can put the screw
through.
Fiddle with it and eventually you'll get it right.
Servo replacement
The pitch and aileron servos are
side by side behind the main shaft.
They are not screwed in,
the are secured by the plate that holds the
top bearing for the main shaft.
You can replace them by:
- Power on the heli, move the swashplate to the top of
the main shaft, power off the heli. This will give you
room to work on the next steps.
- Remove the clip that bundles the servo wires together on
the side of the frame. You'll need play in the wires to
work on the servos.
- Remove the screw that secures the horn to the servo and
pull the horn off.
- Remove the six screws that hold this plate to the frame
and remove the seventh screw that holds the top of the
elevator servo.
- Now you should be able to lift the plate up enough to clear
the frame and still have space to twist it around the main
shaft. Twist the plate one way or the other to free the
servo and replace it.
Do everything in reverse to secure the new servo.
One problem you need to address is replacing the horn on the new
servo properly.
Before I re-attach the horn I power on the heli
and use the collective control to again move the
swashplate to the top of the shaft
(it'll be tilted because you haven't attached
the horn to the new servo yet) and power off.
Now attach the horn to the new servo and
position the horn such that the swashplate
is level,
that should align the new servo properly.
The elvevator servo is simple.
Remove the horn,
remove the two screws that hold the servo
to the frame, and
replace the servo.
When re-attaching the horn you need to do
the same technique as above
(power on,
swashplate to the top,
power off,
positon horn so swashplate is level)
to make sure
the horn is positioned properly.
Tail gear replacement
This is the plastic gear that mates with
the main gear and spins the shaft that
goes to the tail rotor,
another part that has a tendency to lose
teeth on crashes.
I found instructions online for replacing
this gear by removing the tail boom but
I don't like that technique,
it's a little too invasive for my taste.
I prefer to use the following technique:
- Remove the main gear. You should be an expert at this by now.
- Remove the electric motor. It's only held on by two screws,
remove them and drop it out.
- Remove the metal plate that holds the tail gear. Remove the screws
from the side of the frame to free up this plate. With a little
bit of futzing you should be able to twist the plate and pull it
out through the front of the frame.
- The gear itself is not screwed on to its shaft. You have to unscrew
the collar from the bottom of the shaft so that you can remove the
shaft from the plate. Then you can push the gear down, exposing
the teeny rod the goes through the shaft. Just pull that rod out
and the gear will now come off.
As always,
just do those steps in reverse to put things back together.