Copterx CX450BA Black Angel Build
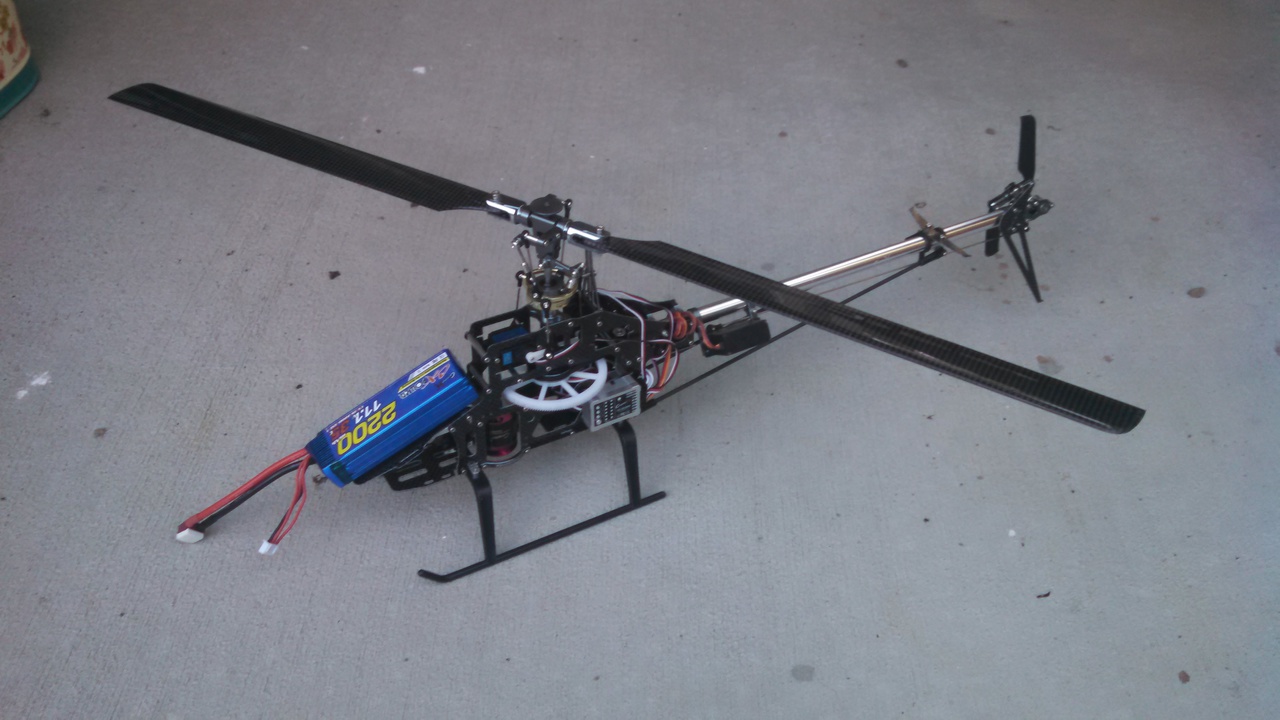
Note, my unit was an FBL (Fly BarLess) but Copterx is too cheap to create a separate instruction manual so the instructions were for a unit with an FB (fly bar). This is not a problem, you just ignore anything related to a FB and the assembly winds up being just a little easier. (Note to Copterx - an insert that points out the few minor differences and shows the exact parts in the FBL kit would have been nice.)
Pro tip. The FB instructions do create one mistake for an FBL heli. When attaching the linkages to the swashplate the instructions explicitly point out that you use a 23mm linkage. Fine for connecting to the FB but too short when connecting the swashplate directly to the main blade holder. The kit includes the longer linkages, make sure you use them.
Pro tip. Careful with the support structs for the tail boom. You have to glue two end pieces to a plastic rod to create each strut. I neglected to dry fit the two struts properly and wound up with one that was noticably longer than the other. Fortunately I was able to drill a new mounting hole in the longer strut but more attention to detail when gluing the end pieces would have avoided that mistake. (Cyano-acrylic glue is very unforgiving.)
Critical pro tip. Although the instructions actually specify the correct way to attach the drive belt to the rear rotor gear it's not very obvious and I got it wrong, with some rather unfortunate results. It is crucial that the belt is attached in such a way that, when the main gear is rotating in a clockwise direction (as seen from above, looking down on the heli), the tail rotor is rotating counter clockwise (when looking at the tail from the right side of the heli with the nose of the heli to your right).
Turns out the tail rudder control arm is screwed on with a left hand thread. If the tail rotor is spinning in the wrong direction this control arm will spin off it's mount (no matter how tight you make it) and the tail will be utterly uncontrollable. Spend some extra time and make sure you get this right.
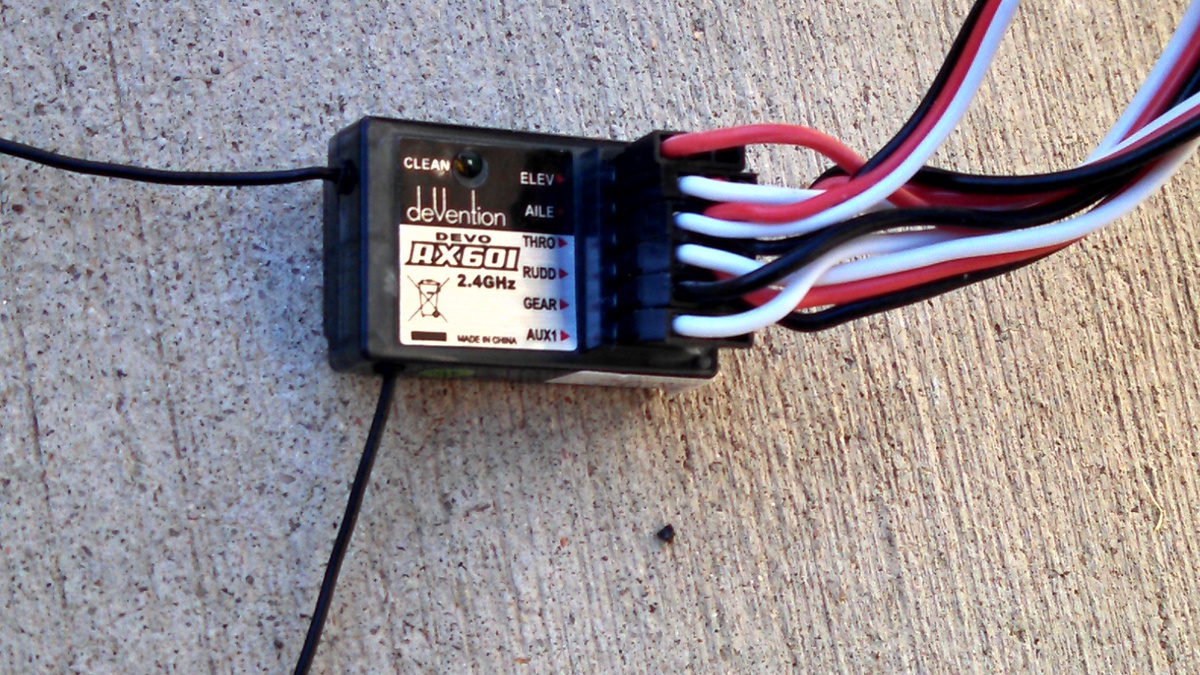
As I said, I opted for the electronics package from eHIROBO with a Walkera receiver. The specific parts I got were:
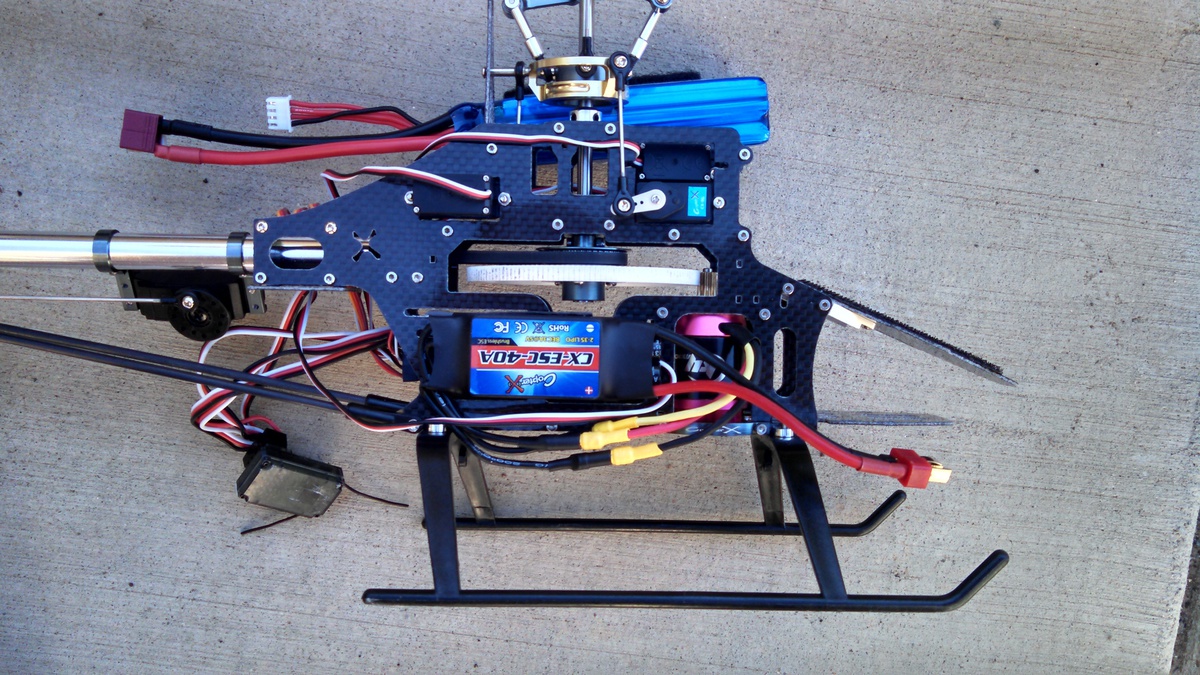
Although there are fail safes (the ESC isn't supposed to provide power to the motor if the throttle is not at 0% at startup) you might want to seriously consider removing the gear from the motor when configuring the ESC (or at least remove the main blades for this step). The last thing you want to have happen is to have the motor spin up and have the main blades rotating at high speed while the heli is on the bench.
Pro tip You have to configure the ESC with the motor attached to the frame. The ESC generates programming tones by vibrating the motor which then vibrates the frame, effectively using the frame as a speaker. By itself the motor produces almost inaudible sounds.
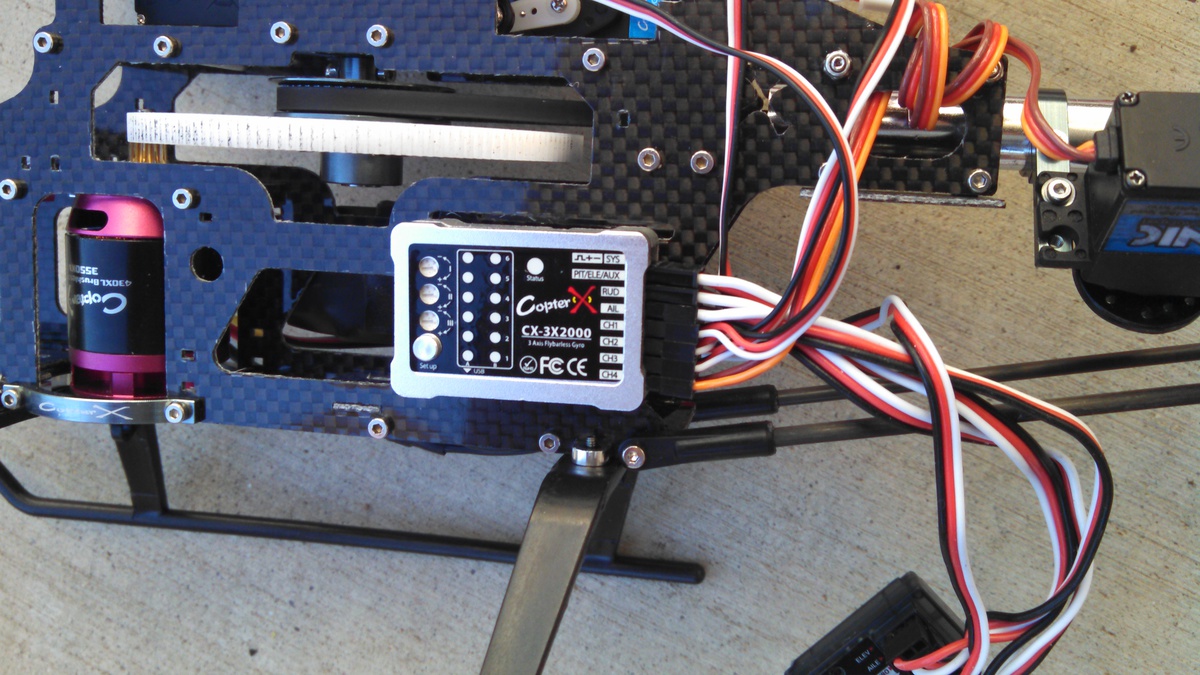
One issue is not having enough connectors. Turns out the Copterx 3x2000 gyro that I'm have has a 3 to 1 cable for some of the connections (a single port on the gyro fans out to 3 ports on the receiver). Combine that with the simple cables in the package and you should be fine.
Tangent on helicopter versus fixed wing controls. A normal fixed wing plane uses 3 controls - elevator (the horizontal flap in the tail that tilts the nose up or down), rudder (the vertical flap in the tail that tilts the nose left or right), and the ailerons (the flaps on the end of the winds that tilt the wings up or down). A helicopter uses the same 3 controls to accomplish the same effects execept the rudder signal affects the tail rotor, the elevator signal changes the front/back tilt of the swash plate and the aileron signal changes the left/right tilt of the swash plate. A helicopter needs a 4th control, pitch, that raises/lowers the swash plate to make the heli go up and down. Since fixed wing planes don't normally have a pitch control (we're ignoring planes with variable pitch propellers, I guess those aren't too common in the RC world) we need a 4th control channel, typically the aux channel, to control pitch.
Back to the wiring setup. From the last paragraph you see we need 5 signals (did you forget about the throttle) to control the heli - throttle, elevator, rudder, aileron, and pitch. For this gyro you also need a 6th signal, gyro gain, but the RX-601 is a 6 channel reciever so we're OK. For the extra heli control signals we're going to use the receivers AUX1 channel to control pitch and then use the Gear channel to control gyro gain.
The following tablel shows the exact cable connections from the receiver to the Gyro:
| Receiver | -- | Gyro |
| Elev | -- | Ele (pit/ele/aux - Red) |
| Aile | -- | Ail |
| Thro | -- | ESC |
| Rudd | -- | Rud |
| Gear | -- | Aux (pit/ele/aux - Black) |
| Aux1 | -- | Pit (pit/ele/aux - White) |
Notice how we changed the meaning of the Aux channel between the two devices. Sorry about that, those are just names, the important point is that the right signal from the transmitter will be sent to the right servo with this layout.
Next we have to connect the servos to the gyro. There's a handy little chart in the 3x2000 manual that shows the servo layout for various swash plate designs. The Black Angel uses a 120° layout so the servo connections are:
| Servo | -- | Gyro |
| Front right | -- | CH1 |
| Front left | -- | CH2 |
| Rear | -- | CH3 |
| Tail | -- | CH4 |
Pro tip. Back to my rant on keyed connectors. On my setup the gyro jumbo port (pit/ele/aux) and the Rud port get keyed connectors, all the other connectors on the gyro are unkeyed and can be inserted backwards. Not a problem as long as you make sure you insert the connects such that the White lead is on the front side of the Gyro. Of course, the connector for the tail servo doesn't have a white lead, make sure the Orange lead is on the front side of the Gyro for that connection.
Pro tip. Yet another rant on keyed connectors. Likewise, the receiver throttle port is the only one that gets a keyed connector, all the others are unkeyed. Again, use the White lead for orientation and insert the connectors such that the White lead is closest to the lettering. The 3 cables from the Gyro jumbo port have various colors, insert those 3 connectors such that the single lead, of any color, is closest to the lettering.

I'm using 20 lb. double sided mounting tape to attach the components, it seems sturdy enough to hold them in place. A cable tie around the Gyro and ESC would probably provide a little extra piece of mind and is recommended.
Using the computer to configure the gyro is very simple.
That is all that it takes to configure the gyro. A couple of points you want to consider for your configuration:
Pro tip. The electronic swash mixing is done by the 3x2000 gyro, not by your transmitter. I didn't realize this when I started out and I tried to program my transmitter for a 120° swash plate and the servos were moving all over the place. Turns out the proper solution is to just program your transmitter for a normal swash type and do all the swash mixing inside the gyro.